Showing posts with label My Scrap Chick. Show all posts

Saturday, August 23, 2014

Mad Hatter Hat Box


Hi everyone!!  I have been so busy, but I wanted to share a great Hat Box I made using a few files from My Scrap Chick. I built a Mad Hatter, Alice in Wonderland Birthday Party for my Granddaughters last week.  I promise to share it when I am less busy, but for now, you get to see one of the hats I made. 

I really like using no more than three files on each piece.  I absolutely LOVE this Hat...isn't it darling? You won't believe what files I used!

The Hat is from the Uncle Sam Hat Box
The Red Rosette is from Easy Rosettes
and the Rabbit Ears are from Bunny Top Hat Box


As you can see, I made a lot of them, though the ones shown are not decorated.  It rained the day of the party, so I only used a couple of them to decorate the house.  


Here's a game...Hat Stacking.  Not as easy as you think for 4 year olds!  Another idea is to take the lid off, add a ping pong balls and have fun with the game, Bozo Buckets. 


Add them to a Wine Bottle Holder...nice centerpiece to a tablescape!!


Punch a hole in the lid, add a cute little die cut to a straw and insert in the lid, create a great table decoration.  


I Love how it opens so easily at the top!!  What a great gift box or party idea for any occasion!!

Thanks for stopping by! I am finishing two parties this week you won't want to miss!!

~Margie


Saturday, July 12, 2014

It's a Girl


Hi friends, I just have a really short post for today. I have been fighting the flu for over a week now. I just can't seem to shake it, so needless to say I haven't done too much at all this week. This is actually a party I did a few months back.  Nothing huge, but I was able to use one basic pinafore pattern from My Scrap Chick for the bunting, favor boxes and pinafore centerpiece pokes. 


I had decided on pastel polka dot papers, which I didn't have, so I just did it digitally and print & cut the pinafore patterns from my Silhouette Cameo Collection Papers. The Pinafore was actually a shaped card, folded over at the shoulder.  I wanted the look of puffy sleeves so I glued the front of the pinafore to the back, leaving the sleeves unglued. This way, I could thread the ribbon right through each puffed sleeve, in one-side and out the other. Just add some mini clothes pins to the line and you have a darling bunting! It would have been cute to tie some fabric strips to the clothesline between the pinafores...a very vintage looking piece.  Very Simple, but really cute too.  
I also made some Pretty Poke Pinafores for the table centerpieces. These will stand up alone or you can drop them into a vessel by making the rosette the same size as the bottom of the vessel.  I used the Easy Rosette  file from My Scrap Chick to create a base for each stem. Then, I glued the straw to the center hole. (add a stick to that straw for stability) 
  

I made sure the Rosettes were rigid, so it would allow the straw to stand straight up.  I like to add either a metal washer or a quarter to the bottom of the rosette, just to weigh it down a little bit. I love the way this came out and really only took a couple hours to get it put together.  More adorable files from My Scrap Chick!! It's nice to be able to build an entire party using only a few files.   
So thanks friends for stopping by.  I have a couple new parties I will be working on in the next coming weeks.  See you soon!  Happy Crafting!
~Margie 


Monday, June 23, 2014

Vintage Picnic Basket


I had a busy, busy weekend...or should I say, Saturday! I planned a outside picnic for 1800 guests and the last 25 minutes it rained...it didn't just rain, IT POURED, with 72 MPH winds!!  We lost a tent or two, but had a great time for 4 hours before this storm blew in.  I am glad it came at the end of the day, you know what they say, "the show must go on"!  
   So today, instead of trying to outdo myself with a detailed My Scrap Chick project, I just wanted to create something very simple. I decided to go with the MSC Picnic Basket and Sandwich file. I am thinking this Picnic Basket would make an adorable party favor box.  You can even add a cupcake insert to the inside because the lid comes off completely.  How about adding a crystal colored bead to the lid, for a vintage look?  
I turned to my paper for some inspiration and came across a sheet that was kind of cool looking.  It looked like wood slates or fencing and in the corners some very simple flowers and scallops were printing on it. I usually step it up a few notches and combine 2 or 3 files, but not today. I was originally thinking I would make a bunting for my backyard flower cart....but I am still so tired, I just needed something quick, but simple & beautiful. 
This cute little picnic basket took me all of 5 minutes to put it together.  I like the fact that all the pieces fit on one sheet of cardstock. I could have added 3D Flowers, some ribbon...maybe a button or two, but honestly, folks, I am just too pooped!!  It usually takes me a couple of days to recoup from this event...but this time the soaking rain on my old bones makes for an extra day or so on the couch...hahaha!!  So thanks for stopping by and check back again, I promise to share that bunting on my cute little flower cart soon. 

Until next time friends,
Thanks for stopping by!
~Margie   

Wednesday, May 7, 2014

Sprinkled with Love Baby Shower


Hi friends, I wanted to share this adorable baby shower I created for a little boy, titled Sprinkled with Love! The theme colors were shades of Gray, Yellows, and White. I mixed several files from some wonderful designers to complete this project. The centerpieces were created by two kits from My Scrap ChickCute as a Button Boxes and the Cupcake Stand File


So, let me try to explain how I did these little pedestals. I use them all the time and everyone is always amazed as to how it's done.  I use my kitchen stemmed water glass, similar to a wine glass with a bigger bulb. The stem and base are big and heavy so it would tip over.


I just place a luncheon plate over the rim of the glass. Be sure the plate rim is BIGGER than the opening of the glass, so it doesn't slip off.  Then, I take the top of the Cupcake Stand and place it over the plate, covering it completely. DONE! It's simple and darling.  Don't forget to fill your glass with pretty candies!  The ribbon on the pedestal is actually the printed cardstock cut into strips...nice took to tie everything together.  


I added double-sided Pretty Poke Storks from Little Scraps of Heaven, which were poked into the floral centerpieces on the dessert table.    
The Chevron Banner Round is from the Silhouette On-line Store from Snapdragon Snippets.


The little watering can with heart button and little boy rompers were added to the bunting to break things up and tie it all together.  Matching ribbon came from Hobby Lobby!!!  Too cute for words!! 


I don't do many little boy showers so this was really fun. I love the colors and the theme. Very simple but still elegant.  

On to a BIRTHDAY PARTY BOUQUET for this week friends.  Happy Crafting...stop by anytime!!

~Margie
    

Tuesday, April 8, 2014

Spring Chicks


Hi friends!! 
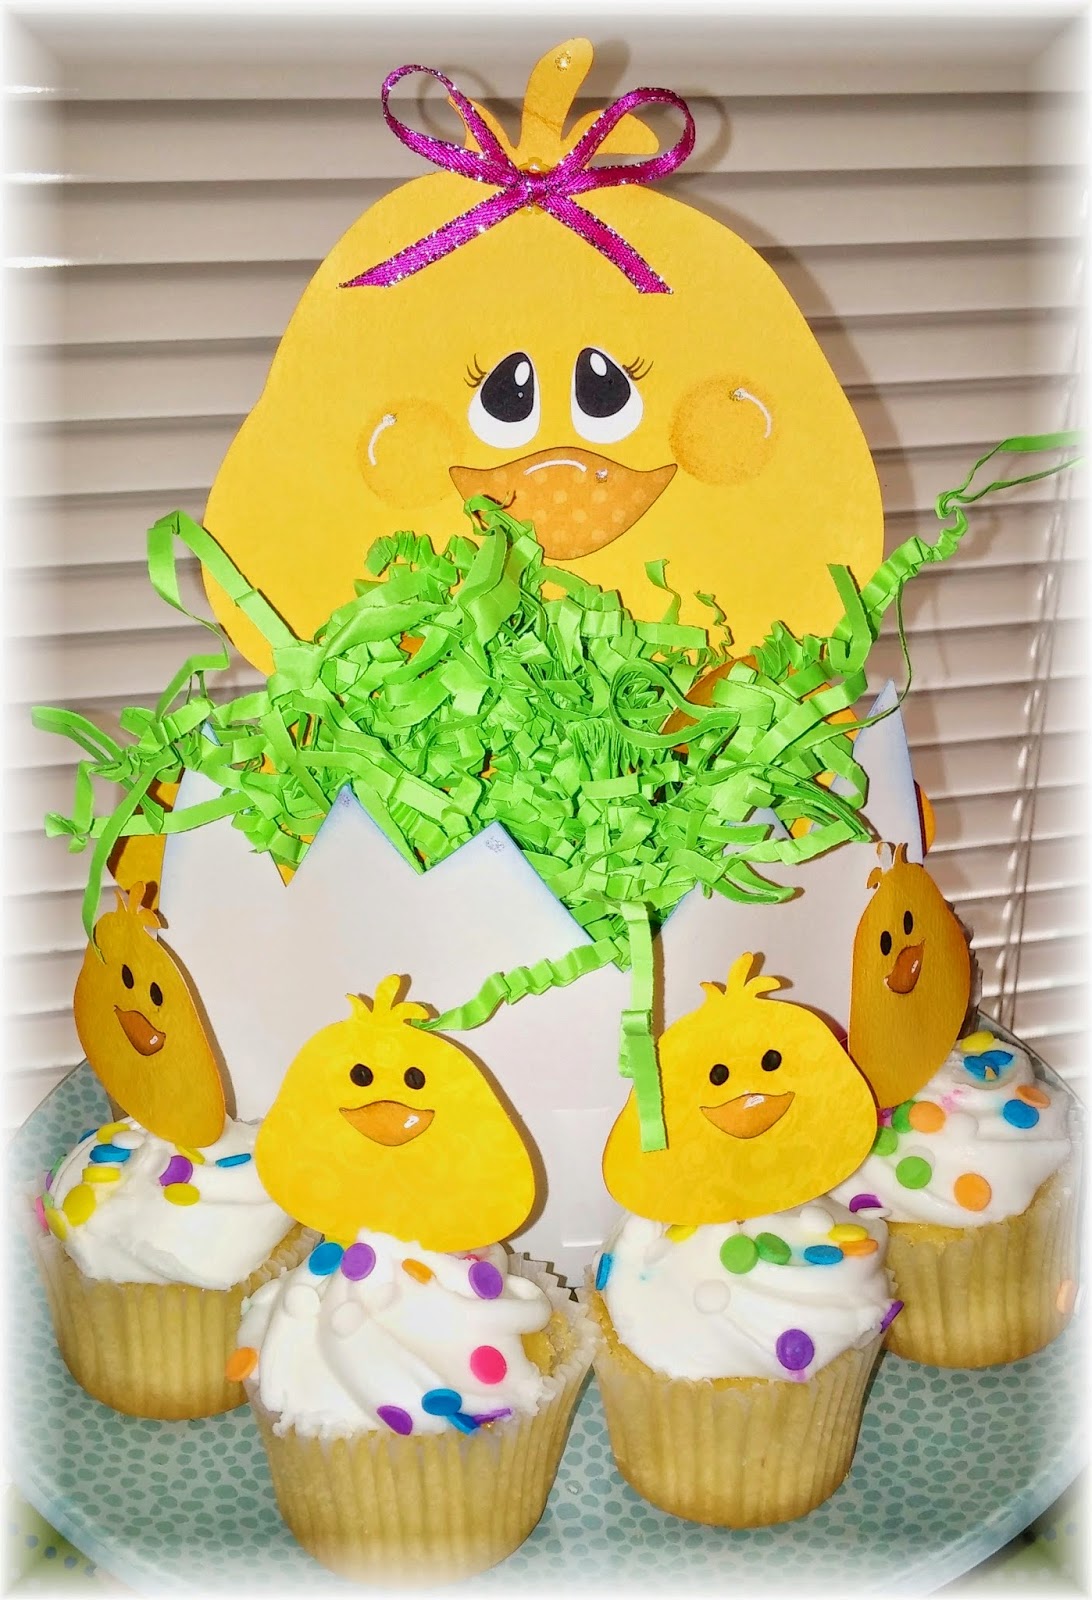
This week I created a party from the Trio of Chicks and Happy Spring Title files from My Scrap Chick using BO Bunny Double Dot Cardstock. Cuteness OVERLOAD!! The files are just so easy that you can create an entire party in an afternoon.  So this file has a Card, a Tag and a Gift box...all of which I did not make one of !! LOL.  My thought was, you can make these three pieces that come with this kit and I would give you some additional ideas on other ways you can expand this kit to a complete party theme.  I am going to start with the Chick Gift Box in the kit. To used this file as an "Easter Party Theme" so I would make the gift box into a Favor Box at each place-setting.


The little chickie cupcake pics, are really easy to make and they look adorable poked into cupcakes, danish or even little fruit, jello or pudding cups. I do like to make these double-sided papers from Bo Bunny, so be sure to check those out, but if the opposite side of the cardstock was white...they would look like little ducklings..which would be adorable as well. It would be cute to frost the cupcakes yellow so they look like the chicks body.


Do you love the PEEPS goodie bag topper?  Just fill it with some colorful peeps; nice to give away at the end of party or as game prizes.  (how about "thanks for coming, PEEPS!!)  The topper can also be used on a dessert pedestal or cake plate....such a cute idea! The Happy Spring Title has all the letters I used to spell out  P-E-E-P-S & S-P-R-I-N-G ...so everything matches! I also LOVE those little flowers included in this kit...nice filler to use on EVERYTHING!


The centerpieces, well I have to admit, I didn't know if these gigantic chick centerpieces would work, but I totally LOVE the way they came out. The chicks are about 7" tall x 5" wide.  Their egg shells were cut a little wider than the chick...about 5.75".  I wanted the shell to bow a little so I could tuck in some Easter grass.  If you cut down an empty paper towel holder and push it inside it will help the chick to stand up so you can stuff it full of grass and goodies to use on the center of your table. 


Ok lastly, I made an Spring Banner out of the little tag file, and of course all my favor Bo Bunny Double Dot papers.  I added the chicks and the letters to spell out S-P-R-I-N-G, now I can keep it as a Spring decoration, rather than just for Easter. 


I totally love the cuteness of this file.  Honestly, it would be really cute to use it for a baby shower as well.  So, hop on over to My Scrap Chick for this wonderful file and several other new files this Spring.
I have a bridal shower and an ESPN themed party to build this week. Check back and see the results, I am putting on my creative thinking cap today!!  hee-hee!! 
Thanks for "hopping" by friends. 
~Margie       
    

Saturday, March 29, 2014

Smiles and Sundaes


Hi Friends, 
I wanted to share this adorable My Scrap Chick file with you, it's called an Ice Cream Easel Card.  I LOVE the details on this card...it looks real, doesn't it?   

    
The file actually comes with a spoon die-cut as well, but I added a real plastic spoon along with a bowl of toppings next to it (a real straw added would have been cute too).


I used the Print and Cut Feature on my Silhouette to make the polka dot labels. Super quick and easy. MSC Easel Cards really make adorable menu cards for simple and traditional parties, to colorful theme parties.    
Stop back on Monday, when you can see the entire Tabletop Shop using this same file.  It's funny how one My Scrap Chick file can create an entire party! Thanks for stopping by!  See you on Monday, you are not going to want to miss this one!
~Margie 
  

Thursday, March 20, 2014

My Day with Mary

Hi friends, hope all is well with you and yours.  I am still on Cloud 9 with the  first of the Mary Engelbreit Paper Piecing Kits that came out at My Scrap Chick. The Design Team has been busy at work playing with the new file. I thought I would share my M.E. creations with you each week; I was thinking "Mondays with Mary" would be perfect, but that would mean I would need to post each and every Monday? We both know that's not going to happen, so instead, I am calling it "My Day with Mary"...that way I can post ANY DAY of the week...LOL!!!
   
I just LOVE the first file, Ann Estelle!!!  I can honestly say...there are a LOT of pieces.  I have a feeling that is how most of her files will be, but I welcome the challenge. My first attempt was to use the square card from the Easel Card Assortment.  I just love this look, the black cardstock really makes the colors of Ann Estelle POP!  Isn't she a beauty?  After posting on our DT fb page, I heard that My Scrap Chick made a similar card...hopefully she will share it on the fan page so you can see a different version in shades of pink...it's adorable!!    

I also decided to try my hand at the MSC Birdhouse Trio kit and use the same M.E. theme.  I made a simple version, but it really needed to be DRESSED in the Mary Engelbreit theme...so that's what I did!!  I absolutely LOVE, LOVE, LOVE they way they came out.  I used the same color scheme on each little birdhouse so they would all match..and match the M.E. theme in my kitchen...totally me!!  I am all about Bold and BRIGHT!!


So, this first Birdhouse is the tallest of the three.  I made it as tall as I could so the height is just about 8.5" tall from the tip of the chimney to the foundation.  As you can see, I went "crazy" with the details, to give it that whimsical M.E. look.  The black and white checkerboard was some  paper I had in my stash, but have since seen a similar size as a fill paper on my Silhouette Designer Edition program. I just printed the cardstock with the tiny black polka dots and the roof myself.  All the flowers, both large and small came with the kit as well, (I re-sized them). The large flowers on the roof are glued to a small clothespin and clipped roof shingles.   I did this same thing to all three birdhouses.  Love the look! 


The middle birdhouse measured in at 5.25" tall. I actually made two of this size, so I could give one away...but I added to this collection so you could see the differences in the two. I LOVE the little cherries...so cute and simple.  And the roof was just finished with a little white ink on the scallops. As you can see, the roofs are removable so you can fill it with goodies.
   
The smallest of the three birdhouses is actually my favorite of all.  It measures out as 4.5" tall.  I needed to match the papers but I couldn't print the white dots so instead I cut them out and put the white papers behind...it's a cute little polka dot birdhouse with a roof of cherries.  LOVE IT!
Just a few more pictures of the clothes-pinned flowers.  Like I said, I glued the flowers to the clips so I could clip them around my kitchen on several pieces...since my kitchen is actually the M.E. Theme.  So...I have to tell you about this plate.  I got it as a gift from my husband when our kids were little. My husband was in the military so we never had family around us to celebrate "special happenings and birthdays".  I decided to use this plate to create one of our 1st Family Traditions.  If it was your birthday...you got to use it for dinner, if you had a great report card or did something worthy...we celebrated YOU!  Today, I have it displayed on my counter and WE STILL USE IT.  Now, my babies are all grown up, some even have their own babies...so it's really special to us.  I added two M.E. flowers to it...looks so cute!!


  These are my little herb pots I use on my window sill.  I will be planting in them soon, so I dressed them up with the M.E. flowers as well.  


Lastly, I clipped a couple flowers on my napkin holder...really dressed it up. 


Ok friends, 
Thanks for stopping by.  
Next week I will be showing you some Princess Wands, so check back soon.  

~Margie
       

Wednesday, March 5, 2014

Easter Mugs


Do you remember the blog entry from November
The Snowman Mug Shot? This new piece, the Easter Bunny Mug, is using the same kit, Full Cup Treat Holders!  I am not going to go through the process of how I made this piece again, but, I did use the Trio of Bunnies Kit as well  to create this adorable little guy.  I choose spring like pastels colored cardstock and some pretty twine. 
Just like the snowman, the bottom mugs hold some wrapped candy treats, and the middle mug can hold a cello bag full of treats.  Each size mug piece fits into the other.  I did cut two holes in the top of the hat to poke in the ears.
The little blue bird is from Bird on a Branch.  I love the little birdies...they add a touch of whimsy to these favor boxes. Lastly, I just want to mention that I used two embossing folders, buttons and dotted swiss.  Oh...and don't forget the buck teeth...I just cut those myself.  
Until next time...Thanks for stopping by!!
~Margie   

You won't believe this!!!


As a member of the My Scrap Chick Design Team, I am so excited to tell you the BIG News this week!! They are licensing the artwork from our most favorite artist ever, Mary Engelbreit!!!!!  I am MORE than excited about this!!  I am a avid M.E. collector, and have loved her for years!!  I look forward to paper piecing her artwork.  Be sure to sign up for the Freebie Friday Newsletter to see what's new, and of course get a free download!!  This Friday they are releasing the first M.E. file....ohhhhhh, I can't wait!! Thanks for stopping by, 
~Margie    

Friday, February 28, 2014

My Scrap Chick Design Team


Hi Everyone,  I am so excited to share that I was invited to stay on the My Scrap Chick Design Team for another 6 months!!  I had such a GREAT time for the last 4 months and look so forward to my next term!  Be sure to stop in and sign up for their Freebie Friday Newsletter to see what we've been up to during the week.  Lots of "creative minds" in our studios. 
My next blog entery will be on Wednesday, March 5th.  I will be showing my Easter Mug...and if you saw the Snowman Mug I bet you will love this one too. 

Until then...thanks for stopping by!

Pssst....Hey, did you hear there is a BIG SECRET on the My Scrap Chick Facebook Page?   The big reveal is TUESDAY...unless someone guesses before.  So don't miss out..."Like" the page and get in on the guessing!!  It's amazing!!

~Margie    

Sunday, January 26, 2014

Loving Lady Bug

Hi everyone...


Wow, this has to be a record for me...I think this is my third piece I have showcased since last week.  I have actually made several of these My Scrap Chick Pavers....like the Snowman, Reindeer, Santa and Gingerbread Man...but this is my first little BUG, from Garden Bugs and I totally loved it!!  I did make a change to the file.  She had little dots on her back, but I made them into hearts instead.  
I wish I would have used a polka dotted paper for the liner on the inside of the box...maybe next time. I have several little Valentines I am going to give to my little Granddaughter....and this will be one of them.  Later this week, I will be sharing a cute sewing card I made for her and I to do together so be sure to stop by again.  
My Scrap Chick  has some "stinkin cute" new files this week.  Check out the adorable little Skunk and Monkey Belly Boxes, you're going to LOVE them!! My Scrap Chick Team shares some really fun pieces on their FB page.  Come on by and check them out. 

Thanks for stopping...
~Margie 


Thursday, January 23, 2014

Heart Top Treat Box


Hi everyone!!!  So happy to be sharing yet another darling file from My Scrap Chick.  This cute little box is from the Heart Top Treat Box Collection.  I made the Tall Box version and plan on filling it with Hersheys Hugs and Kisses for a friend.  The box came with some adorable tags, but I like to mix two files and make something different, so I added some HOT LIPS to the tag instead.  "SMOOCH"!! 

After searching for vintage paper, I found this cute print from Fancy Pants Designs, called the Sentiments Collection and from Bo Bunny, the Head over Heals Collection. I love the look and they seem to really work perfectly together; giving it the vintage feel I was searching for.  The cardstock is double sided, so it gave me a few choices of patterns.  I LOVE the stripes, aren't they adorable...they really tie this project together!!  It took me all of 15 minutes to make this little package!  I even used twine to tie it all together. Adorable!! 
Next week I am scheduled for two more projects ....a sweet candy box and a Lucky in Love Lady Bug which I am going to fill with something special for my 'apples of my eyes', my grandbabies!!

Until next week...
Thanks for stopping by!
~Margie   

Tuesday, January 21, 2014

I Love You this MUCH!


Hi everyone, can you believe Valentines Day is right around the corner? Seems like Christmas was just last week!!  Spring will be here before you know it, I for one can't wait.  It's been a tough Winter for us. A couple weeks ago, it was -45!!!  Yikes!!  What could be worse you ask?  Our furnace went out!!  OMG, it was sooo cold in the house for 24 hours (30 degrees when we woke up.)  We didn't want to go to a hotel, because of our little dog.  We stayed in the house and wore coats for 24 hours.  My heart goes out to those who have to endure this on a regular basis. We are blessed to had been able to purchase a new furnace and have it installed right away.
So, what do you think of this adorable Dinosaur? This is a brand new file from My Scrap Chick called Dinosaur Belly Box.  I added the Banner file as well. I have done another project very similar to this last year, caller Favor Tails. Speaking of that, I will doing more of those very soon...keep a watchful eye...they are really cute.
I have another file coming out on Thursday this week too, I know you will love....see you again soon. Lots of fun new files over at My Scrap Chick, check them out.  
Enjoy your week.  Happy Crafting!!

Margie  

Monday, December 23, 2013

More Christmas Centerpieces

Hi Everyone, Thanks for stopping by to see the other centerpieces.  My event went well but not too many good pictures...boo!  I do have to tell you what happen.  So my daughter was able to help me set up since I have a shoulder injury...torn rotary cuff.  I am ok to pick up some things, but not able to stretch or put up the canopies on my Tabletop Shop. She was a huge help in setting up the table but because the car was so packed I failed to take a few things that I really needed....hence the poor pictures of the event.
Anyway, while we were in full swing, I hurried over to clear a table and TRIPPED on a coat that was hanging off of a chair and fell SPLAT on the cement tile floor!!! OMG...I was so embarrased...the Dickens Carolers went silent, everyone stopped in their tracks...even Santa jumped off his chair and ran to my side.  A nice gentleman quickly grabbed me by the shoulder and was ready to pull me up, when someone yelled...NO don't move her!!! I was SOOOOO embarrassed.  But every bone in my body was SCREAMING!  I thought for sure I broke my wrist.  I quickly picked myself up and wanted to run away, but the show must go on.  I stayed, finished the event, cleaned up, then went to the ER.  Nothing was broke, thank God, but I feel like I was hit by a bus!  I am so, so sore. Every bone in my body hurts. Ugggh.  I will never forget this holiday party that's for sure!  I heard someone say...WOW, she hit the floor like a sack of potatoes!!  LOL...thanks!
Ok, enough of that, lets move on to the centerpieces. The Candy Cane and the sleigh are both from My Scrap Chick. So easy to make.  Each of the centerpieces use at least 3 files. Each had a box as the base and then I used two other files for the main design.  
All in all, I made 6 centerpieces, with the same color scheme.  Added bows and accents as well to make each whimsical centerpiece shine and twinkle in Christmas lights.  


My Scrap Chick has some wonderful files.  Very quick and easy to put together.  Not to mention, their cuteness is beyond words! 


Both the Santa Pants and the Elf Shoes came from SVGcuts.  These are a bit more detailed, but really fun files as well.  
Friends, thanks for stopping by again.  Have a wonderful holiday.  I will be in touch later next week with something new.  
~Margie